More news about AI
- Vset3D Ai : Professional Virtual Studio Software

- Qwen Image Multiple Angles
- Hunyuan 3D 3.1 international version

- Hunyuan 3D 2.1 WinPortable Local AI Text-to-3D & Image-to-3D on Windows

- The Latest in Generative AI: Microsoft MAI-Image-1, Video Reasoning, ComfyUI Subgraphs & Marble 3D Worlds – Nov 2025

- The Latest in Generative AI: ComfyUI Cloud, LTX-2 Video Model, DiffusionX & VIST3A

Vset3D and FreeD
Vset3D and FreeD
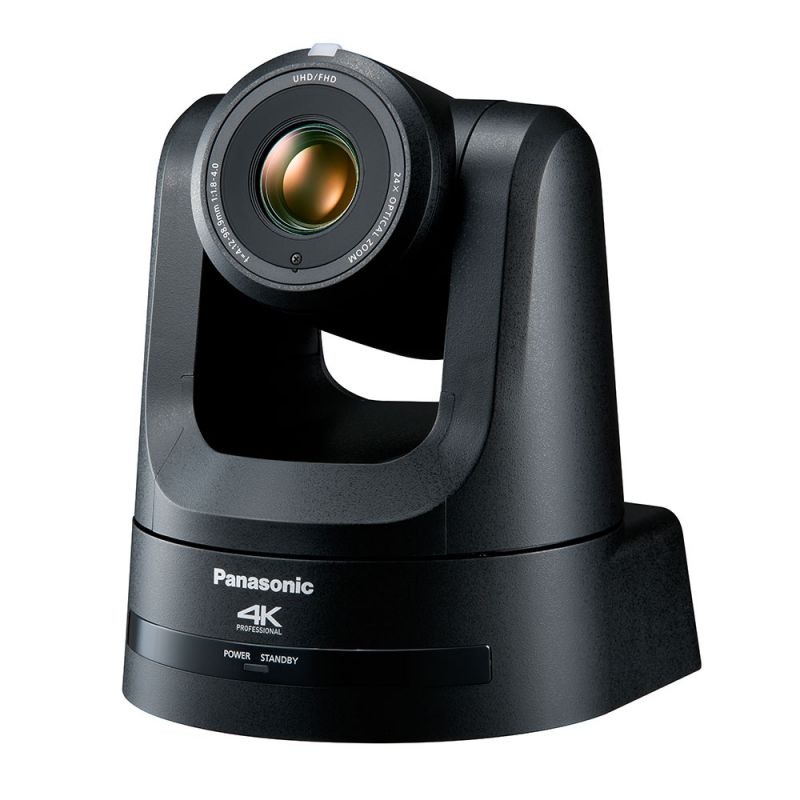
Vset3D Studio is virtual set software that can be used with the Panasonic AW-UE80 4K PTZ or AW-UE100 FreeD camera to create live video productions with a green screen.
Vset3D Studio is designed to be easy to use and offers great flexibility for live content creation, thanks to features such as video and image overlay, subject tracking and chroma key.
 To use FreeD PTZ camera with Vset3D Studio, you will need to connect it to your computer and configure Vset3D Studio to use the camera as a video input source.
You will also need to configure Vset3D Studio’s chroma key and keying settings to achieve professional looking green screen and quality keying.
Vset3D Studio can be used with the Panasonic AW-UE80 4K PTZ camera to create live video productions with a green screen. To use these two pieces of equipment together, you will need to connect the camera to your computer and configure Vset3D Studio to use the camera as the video input source. You will also need to configure Vset3D Studio’s chroma key and keying settings to achieve professional looking green screen and quality keying.
Are you looking to take your augmented reality videos to the next level?
Look no further than Vset3D and its advanced FreeD functionality. With Vset3D, you can easily track the movement of real-world cameras and seamlessly integrate them into your virtual productions.
Whether you’re a professional video producer or just starting out on YouTube, Vset3D’s FreeD tracking opens up a world of creative possibilities. By combining the real-world movement of a camera with the flexibility of virtual sets and graphics, you can create dynamic and immersive AR videos that truly stand out.
With Vset3D, you’re not limited to pre-rendered graphics or static camera shots. Instead, you can move and position your virtual sets and objects in real time, responding to the movements of your camera and giving your audience a truly interactive experience.
To use Vset3D Studio effectively with the Panasonic AW-UE80 4K PTZ camera, there are several steps you should follow. Here are some additional steps to consider when using these two pieces of equipment together:
- Set up your live streaming equipment: Before you start using Vset3D Studio and the Panasonic AW-UE80 4K PTZ camera, you will need to set up your live streaming equipment. This may include configuring your computer, network, and live streaming equipment, such as a live streaming encoder or live streaming server.
- Set up the camera settings: Before you start using the Panasonic AW-UE80 4K PTZ camera with Vset3D Studio, you will need to set up the camera settings. This may include setting the image resolution, shutter speed, frame rate, and other settings that can affect the quality of the image.
- Adjust your green screen lighting: To achieve a professional-quality green screen, you will need to adjust the lighting of your green screen to be uniform and shadow-free. Use diffused lights and reflectors to evenly distribute light across your green screen.
- Calibrate your chroma key: Once you have set up your green screen and lighting, you will need to calibrate your chroma key to achieve high-quality compositing. Use Vset3D Studio’s chroma key settings to adjust the sensitivity and tolerance of your chroma key, and adjust the chrominance and luminance levels to achieve the best possible result.
Calibrate the FreeD camera:
 Using a physical plane as a target for 3D tracking camera calibration is a common and effective method.
A physical plane is a flat, two-dimensional object that is easy for the camera’s 3D tracking system to identify and track.
By placing a physical plane in the studio and using it as a reference point, the camera can more accurately track the position and orientation of objects in the studio, which can improve the accuracy of the 3D tracking data.
To use a physical plane as a target for 3D tracking camera calibration, you will need to follow these steps:
- Measure the dimensions of the physical plane: Use a tape measure or other measuring tool to determine the width and length of the physical plane. Make sure to measure the distance between any objects on the plane, such as the distance between the camera and the plane.
- Place the physical plane in the studio: Position the physical plane in the studio according to the dimensions of your studio and the desired position of the camera. Make sure the physical plane is flat and level and that it is positioned at a distance that is appropriate for your camera’s focal length.
- Set up the camera: Position the camera in the studio according to the measurements you took in step 2. Make sure the camera is level and pointed straight ahead.
- Create a virtual plane in Vset3D: Use the measurement you took in step 1 to create a virtual plane in Vset3D that is the same size as the physical plane. Position the virtual plane in front of the virtual camera at the same distance as the physical plane is positioned in front of the physical camera.
- Calibrate the 3D tracking data: Use the camera’s 3D tracking calibration tools to fine-tune the accuracy of the 3D tracking data. This may involve adjusting the camera’s position, orientation, or other settings to ensure that the 3D tracking data is accurate. Make sure to focus the camera on the physical plane and use the physical plane as a reference point for the calibration process.
By following these steps, you should be able to use a physical plane as a target for 3D tracking camera calibration. This will help to improve the accuracy of the 3D tracking data and ensure that the camera is properly positioned for your specific studio setup.